Three Ways To Hard Reset Sony Xperia XZ FZ833
The presence of Sony Xperia XZ Premium rocked the Android market, especially the market in Asia. This phone was even crowned as the best at Mobile World Congress (MWC) 2017 event by GSMA. For information, GSMA is an entity or organization that accommodates all mobile companies. This organization regularly conducts MWC events every year. This event is usually an introductory event for a variety of new products from leading manufacturers.
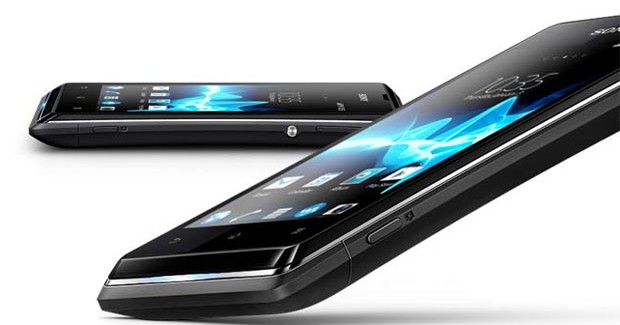
Of course there are several reasons why Sony Xperia XZ Premium was rated as the best in MWC 2017. There are at least three important factors why this device got a lot of positive responses; its charming design, 4K screen, and high-quality hardware support. If we look in terms of design, this Sony flagship device has an omnibalance design with Gorilla Glass 5. The use of glass material is the main reason why XZ Premium design looks unique when compared with other smartphones in the same class.
The second factor is the use of 4K display. XZ Premium is the second smartphone that comes with 4K resolution screen. Sony’s first smartphone that uses the 4K screen is Z5 Premium. The screen landscape used by XZ Premium is Triluminous display. This type of display allows up to 40% higher screen brightness than other products. Now we turn to hardware issues. XZ Premium comes with 19MP Motion Eye camera. This type of camera is capable of supporting HD video capture Super Slow Motion which of course will make every user has the ability to be a powerful vlogger. Not only features slow motion, the camera used this device also features Predictive Capture. The point is that the camera can capture the best 4 photo angles even before the user presses “Capture”.
Hard Reset is a process of restoring the phone to its original state when the product was just opened (unboxed). Unlike other similar products, XZ Premium provides three methods to perform Hard Reset.
Method 1:
- Download Xperia Companion on PC. Or click www.support.sonymobile.com/global-en/tools/xperia-companion/.
- After downloading, install and open the app and continue by turning off the device.
- Connect device with PC using micro USB cable.
- Access Main Menu and select “Software Repair”.
- Select the appropriate option to confirm software repairing.
- After you see the next menu, change the device mode to Fastboot Mode. Hold “Volume Down” together with connecting the device with PC.
- Press “Next” to start the reset process. When the reset process is complete the Welcome Panel should appear.
Method 2:
- Access “Settings” and select “Backup & Reset”.
- Remove Screen Lock.
- Find the option “Factory Data Reset” and click.
- Select “Erase Everything” and you will start the process
- Similar to Method 1, the Welcome Panel will appear after the process has finished.
Method 3:
- This method uses dialer.
- Open the dialer and type * # * # 7378423 # * # *.
- You will see the next menu. Select “Customization Settings” and click on “Reset Customization“.
- You will see a confirmation message, reads “Data will be cleared and factory data reset will perform”.
- Click “Reset Customization” and you will start the Hard Reset process.
Make sure you have saved all your important data into other devices before performing the above three methods.